Showing posts with label mixed media. Show all posts

Friday, February 21, 2020

Man Cave Art - The Bourbon commission story

A good friend and collector referred her sister-in-law in Florida to me to create something for her hard to buy husband.  She emailed me ideas initially, then we had a phone conversation where she told me a bit about him, what he likes, and where she envisioned the piece going.  I also like to have clients go through my website and tell me what pieces they love, ones they hate, so I can get an idea of the type of work they like.  His "office” housed his bourbon collection and tables made from old barrels.  He loves bourbon and so her thought was to incorporate one of the collectible Blanton corks into the piece somehow.

I asked her to send me some pictures of the room, and there was lots of wood, black accents, and little burgundy leather-a very masculine feel. Walls were light beige so the piece had to be darker to contrast it and show up. A plan started formulating in my mind….. I related it to my client, and she liked all the ideas.  Those things she wasn't sure about- she said- "you're the artist!" and gave me the freedom to make some decisions along the way. I have to say a vote of confidence like that goes a long way in keeping a positive approach to a commission, which is always harder than work you make for yourself. In my experience- those pieces turn out best!! So I emailed a contract, listing all the things we had decided on, she signed it and sent me half to get things started. 


So the front of the piece would have the cork, and logos for the two types of his favorite bourbon. Columns of numbers to represent his accounting background run throughout, and we had agreed to leave some wood surface exposed to relate to the bourbon barrels, and also all the wood in his office/man cave.  The hobbies  and childhood home address would be relegated to the sides of the piece, supporting but not as important as the bourbon!!!  Since we wanted to have some wood show, I opted to work on the raw wood with watercolor, staining the wood, but still transparent enough to see the grain.  The concept dictated the medium here!  So did some tests to try out the palette and transfers on wood. 


Next step was researching images that weren’t provided for me, and spending as much time as needed in photoshop scaling them and playing around with the alignment on the piece.  I like to “audition” the images on transparencies before committing them to the surface.


So I learned a lot about bourbon during this.  I did some research on the barrels themselves, and those guys who make them are expert artisans/craftsman! The strips that make up the barrels are called staves, and they’re aged outside, and then they carefully assemble the whole damn barrel without any glue, screws, or nails because that  would affect the flavor of the spirit aging inside. I also learned that they torch the barrels to caramelize the sugar’s in the wood. So..... that gave me an excuse to use my blow torch! Corners of the piece are torched and singed. The simulated staves I initially inked in, but that wasn’t enough so I went back and gouged them in and then re-inked them so they look like separate panels.. Then there were the “hoops” or black metal strips on the outside of the barrel holding it together.   I dug through my supplies and found an old etching using grays from a metal plate. It’s beautiful. I added paint and inks as needed, then sealed the heck out of it. I searched for brads the perfect size to simulate the "Stave Grommets"(as I learned they are called), and positioned them as they are on a barrel.
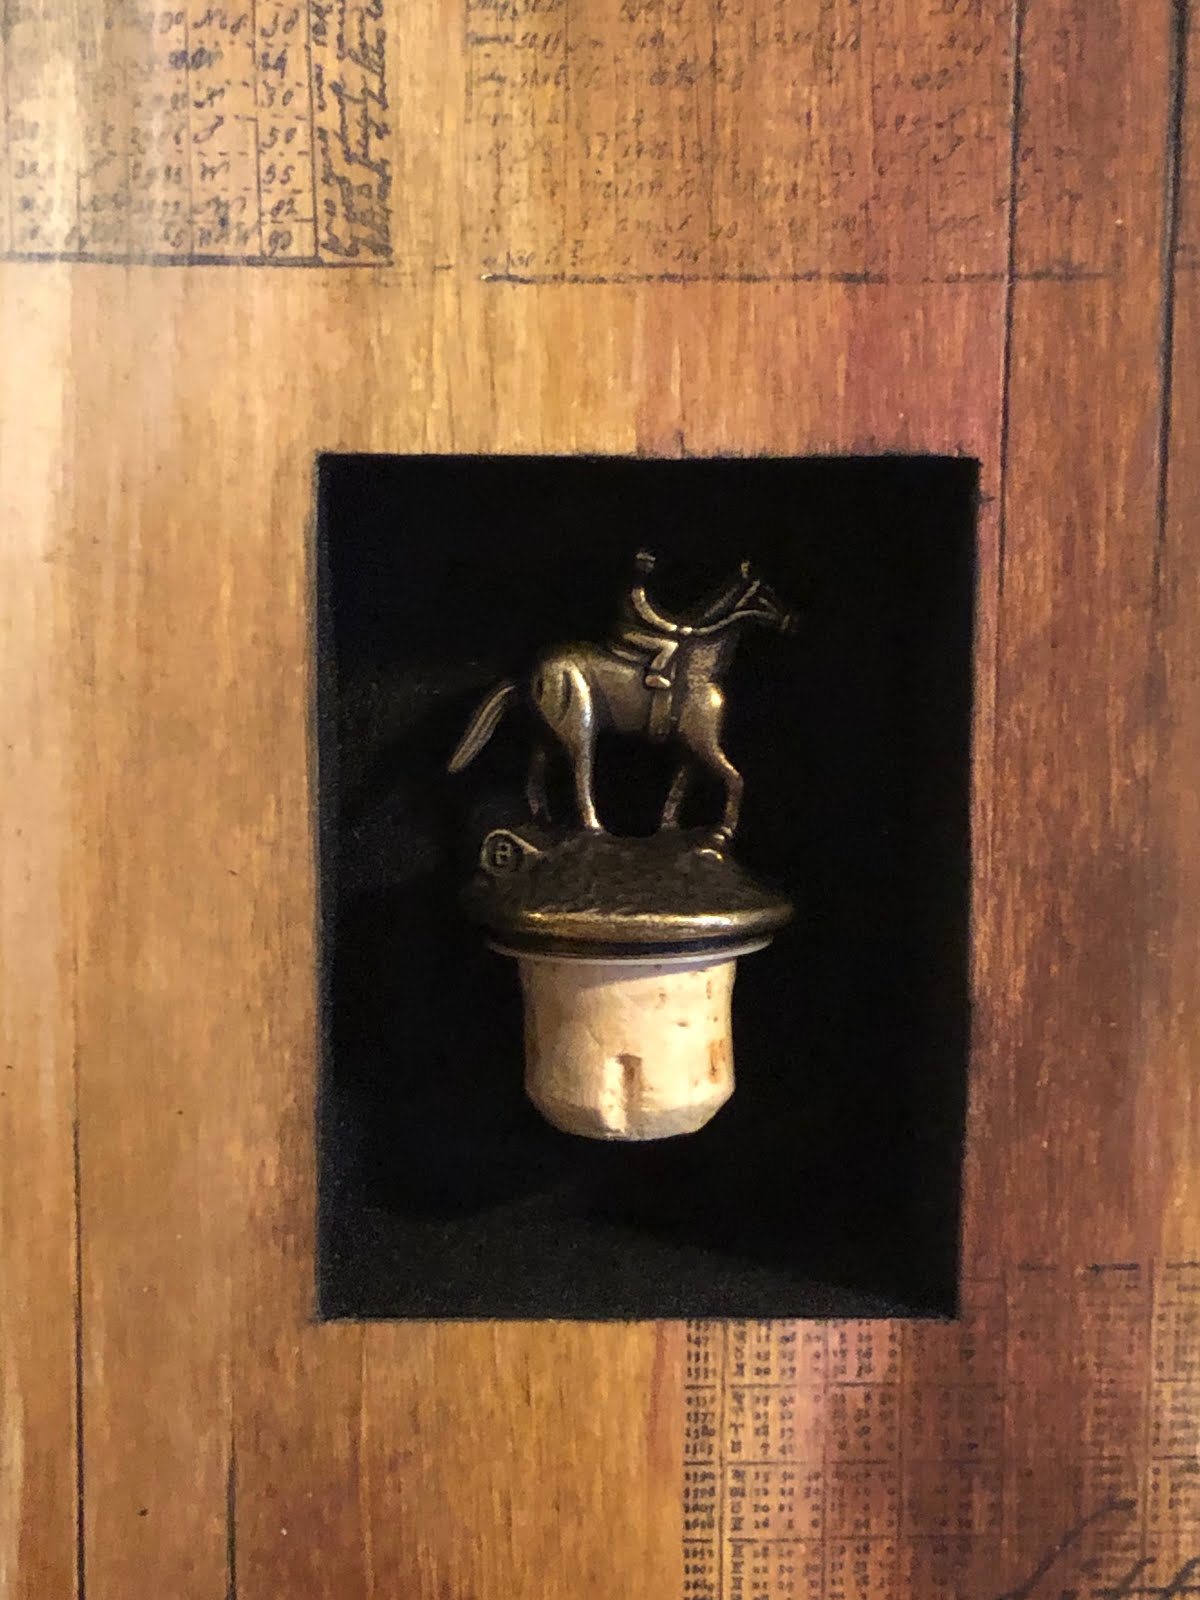

And then there was the niche to hold the cork. I wanted the cork to “float” (or appear to) in the niche.  I wanted the interior to contrast the texture of the smooth wood. They use flocking to line boxes of things that are precious or important, so I thought it worked for the piece compositionally  and meaning wise as well. However, getting a metal rimmed object to securely float on a flocked surface was challenging. There’s always some sort of unanticipated challenge!   But this is one of these times when I am very happy that I have a million tools and materials in the studio to tackle just about any situation that crops up!!  


So normally at this stage of the game I invite my patron over to the studio, and we unveil the new piece and drink a toast to the artwork. Since this was long distance, I had to figure something else out- and I wanted to make sure she was thrilled with it before shipping it out.  My friend (clients sister in law) came over and we did a long distance video unveiling with the client, and she thought it was “fricken awesome”!  And then- we had a glass of bourbon to toast!  That is one of the best parts- delivering a piece that the client is thrilled with.   So far, I've never had a client that wasn't thrilled with their piece!!

Below are some shots of the finished piece.....


Tuesday, August 30, 2016

Finding Joy in the Planning Process

Although I no doubt love a good studio day where I'm getting dirty and pouring inks and paints, selecting twigs or firing up the blowtorch – I also relish some "couch time" with my sketchbook, stack of art books, and iPad, taking time to consider my next series of group of works.  I look at all the plans for pieces I have yet to make in my sketchbook, images collected from other artists whose I admire, and try and figure out what it is I should be doing exactly at this point in life, career, and the state of mind I'm in.   I have a lot of delicious big tasks in front of me, and I took the afternoon to sit down and organize my thoughts, crank some good tunes (the goo goo dolls were calling me this afternoon), sketch out some ideas, look at past plans that I could incorporate in, and allowed myself to cruise Pinterest for a short time. 


There is a total freedom in imagining things, and you're not delayed by drying time, technical difficulties, or supply concerns. Just free reign, working as fast as your mind can imagine! It’s glorious.  I just try to keep up in my sketchbook (although I always fall short), capturing as much as possible on the page.  

I leave energized and ready to tackle the next big thing.

Which is what??  Assemblage/ totems is where I’m at.  I have always said I keep a toe in sculpture, and now I guess you could say I'm up to my ankles. Most are still wall hangings, but they will be much more sculptural, and able to incorporate (I hope) in a cohesive spiritual way all the natural materials I've been working with all summer on my fairy houses, panels of paintings, and shapes of textured surfaces that could be anything for encaustic to acrylic to ceramic.  It think it’s a good way for me to merge all my interests into one.  When I look back- I have been going back to "totem stacking" for over 20 years- I made a large paper cast from a clay sculpture in grad school, I made a totem vertical rectangular series 10? years back, tiny assemblages last year, so now the seems like the right time for this next progression of my work! 


So I started pulling out my works in progress, lumber, found objects and played with them, stacking, selecting arranging.... 


Here's the "roughs" on the floor....


Stay tuned! 


Monday, August 22, 2016

Wedding Art

It's that time of year –I always end up making a little bit of wedding art during the summer months. This year however, things took a little bit of a different turn when my niece Angie and her bride Maria asked me to create an alternative guestbook for them. At first we talked about using barnboard, but I thought the surface would be too rough for people to sign legibly. So they let me go off on my own tangent and make whatever I want. I loved their invitations, and thought it made sense to incorporate them. I contacted their friend who is the graphic designer who created them, she gave me the font types, and I made a slightly larger altered version to include on their guestbook. Their colors were orange and blue– which initially I found very challenging. But I thought fall rust leaves, and went with that. It was kind of hard to not get textural-but I like the distressed two dimensional effect. I think they did as well. And once I saw the old lodge they were having the reception, it fit perfectly!


"auditioning" the placement and size of the logo before silk screening, and embellishing with inks. 


The"final" piece- before signatures of course! 

Then it was onto the actual wedding gift! These two met in the Army, so that had to be included cause it's been a big part of their life for years. They met in San Diego, so a map of that was included as well. I included part of their wedding timeline on the side and use their wedding colors. 
Encaustic paint encapsulated the whole thing so would last as long as they do!


.... and just when I thought I was done, while  I was helping to set up the reception hall,  they asked me to do some last-minute signage for them. This saying that they wanted cracked me up!


Needless to say, shenanigans did ensue...
But I love my big crazy extended Dougherty family!!


UPDATE- the finished signed "guestbook"


Thursday, May 19, 2016

Waid's Woods Mixed Media Series done!

I ran into a lot of technical difficulty, but these are finally completed!


Here is a video talking about what each one contains....


Thursday, April 28, 2016

A Video Sneak Peek at Residency Work

I am trying something new here- a video! 
This shows you some of the new pieces I completed while at my residency in Virginia....


Thursday, March 24, 2016

Little Houses Series- a pictorial development

So this week is a visual of how one of the little houses series- "Trees Waiting for the Blooms" developed. More pictures, less words. If you are reading this- you are probably visual too! 


I started out with a version of song lyrics written on raw wood, then coated with beeswax. 


added some encaustic paint and pastel....


"Auditioned" a tree sketch I had reduced to fit on this house...


transferred it on...


Then added those written words again- but use graphite paper this time so they'd be more legible, prominent.  I also used the graphite to emphasize parts of the tree. The tree is in the stage right before it starts to leaf out, as are the trees outside right now. I had the 10,000 maniacs song “These Are Days” playing in the background. This verse inspired the text inscribed them around a tree: 

You’ll know it’s true that you are blessed and lucky
It’s true that you are touched by something
That will grow and bloom and you

so I wrote "Waitin for the rains to end, and blooms to start."


A little more encaustic detail on the side (and an ice pack to help speed cooling- yes, I am impatient.)


Now to prepare for the roof. 


I LOVE bark- but it can be challenging to work with! 
I had to clamp it down two days in row to get it to behave.


I cut up several branches to find just the right feet- 


...and the finished piece. 
All the wrestling with the bark for the roof was worth it! love the "modern rustic" look! 


PS- I can feel my writer friends cringing at the long, run on sentences with horrific punctuation and capitalization. Yes, it was intentional. 
I am experimenting with focusing on the images rather than the writing....

Available now on new Etsy shop!


Thursday, February 18, 2016

A new Direction-Little Houses

So Valentine's Day is over, And I've gotten all those magentas, fuchsias, pinks and purples out of my system for now. Moving on.  Starting something new! My favorite thing…

Whenever I begin something new, I allow myself some "Couch time" to regroup, refocus. 


 I go back and look at my sketchbooks, and all the plans that I've made for future pieces (always more plans than time to make them), images I've collected, and the things that have been floating through my head. I put them all in front of me and settle into my cozy spot next to Bear on the couch with my sketchbook, pastels, art books, and perhaps some wine and chocolate:) While I was making Valentines blocks for the last couple weeks, I'm kept having this urge to cut the rectangles into house shapes. I look back in my sketchbook, and this” House urge" has been around for over a year maybe two. Time to do something about it. So quickest path to getting rolling was by using some panels I had and chopping off their tops at various angles to create a couple little houses.


I haven't done encaustic since before Christmas, and my torch was calling me! So thought these should be encaustic.  However I wanted to incorporate a couple different materials that I'm not sure would work well with wax. And although I love sculpture, and have always worked my pieces on all sides not just the front as a lot of painters do, this time I just wrapped the encaustic around the two sides, leaving top and bottom unfinished. So I taped them off and jumped into priming a couple of them, not sure exactly where they were going to go, but I had some ideas. 


The first one I tackled was very symmetrical roofline that I worked in a subtle blue-sky background but then faded down to a yellow/ochre -the color of Prairie grass. Dug through my image file for some birds in flight, played around scale and positioning, auditioned them with a piece of transparency, made a copy and transferred them on. This is one of the aspects that I love about encaustic!! If I wanted to do a transfer in acrylic, it would require a special paper, both layers to be coated with at least three layers of acrylic, and basically taking an hour and a half or so before I get to see the image I want on the surface. Immediate gratification! Amen! Or pretty close to it.

Any rate next up was to add some prairie grasses. This is where I love encaustic’s flexibility as well. This process in an acrylic painting could take days to a week, easily. With encaustic I just make sure I have a warm soft layer of encaustic medium, press this grass into the surface. Let cool, trim any stragglers, and cover with another layer of medium, fusing gently so as not to ignite grass on fire:-) 


Of course I had to address the sides too, so repeated the same sequence for the sides.


Now for the top/roof. I used the tacking iron to carefully peel off the painters tape I used to mask it, and wasn't sure how I was going to finish the roof.  Once I had it off, I knew I wanted to keep it rather minimal like a prairie sky. 


So I went into the back room, and dug around my wood piles and collections of bark and twigs to see if I could find a good fit. I came upon two pieces of a gorgeous sandy colored wood, I think I pulled them out of someone's fire kindling bin, but they are gorgeous, match the prairie grasses perfectly, and require no additional treatment. Played around with getting the miter for the top just right, then glued just the two parts of the roof together so that seam was secure. 


Let it dry overnight, then came back the next day to attach to the house. Used my handy dandy sandbags as usual to make sure it had good contact. 


I was considering perhaps some pine bark for the bottom or something else, but I think I may just paint the bottom and keep this one rather minimal. His neighbors in the series we'll have more going on in that area. You’ll see some of them next week!